

How To Create A Pods Template
Skill level: intermediate, demand some HTML
If you're planning to feature ane blazon of information repeatedly, a custom content type ensures that the data is e'er presented consistently. For instance, if I'one thousand edifice a travel site that features guided tours of Europe, I need to be sure that every tour description includes the same information, and always in the same gild:
- Length of trip
- Dates of Tour
- Destinations
- Cost
- A nice image
- Description of the tour
Themes and modules can provide more content types than the basic WordPress page and postal service content types, but these may non totally fit your needs. The Pods plugin is a great tool that lets you create your ain custom content types. Without PODS, y'all would have to edit theme files. With Pods, well-nigh of the time all you lot need is a little HTML. Log in to your exam arrangement and play around with this plugin.
Install Pods
In that location are two plugins you need to install:
- Pods custom Content Types and Fields
- Pods Frontier Auto Template
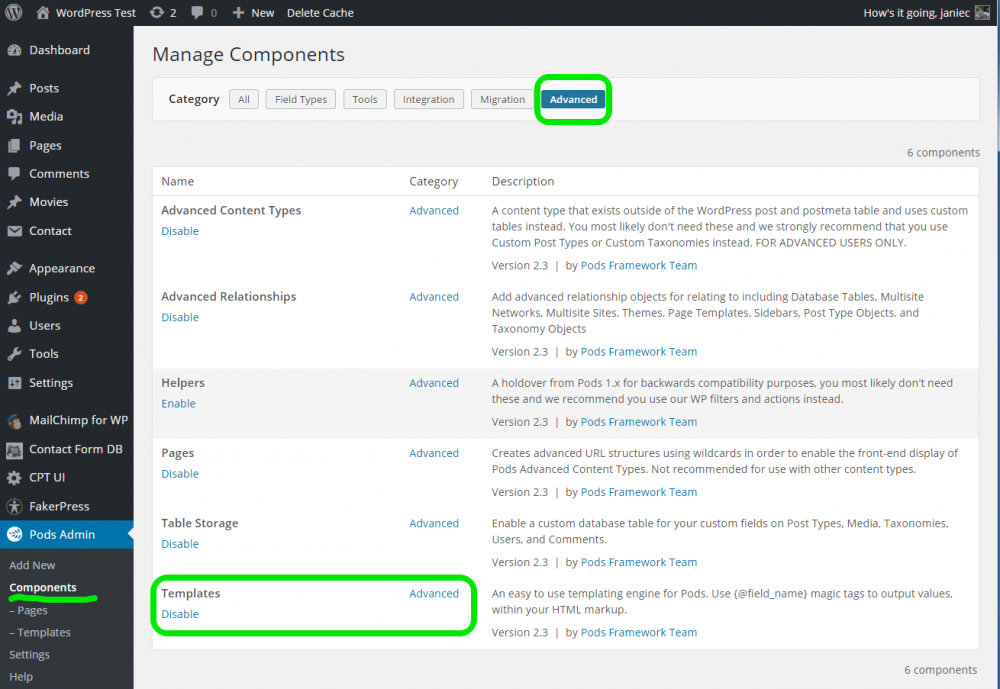
Once they're nstalled, you'll run into Pods Admin appear on your Dashboard. Click to open up the card, get into Components Management and make certain Templates is enabled. You lot can find Templatesunder the All tab, which lists all the components or y'all can click on the Advanced tab to find Templates from a shorter list.
Create a Pod
A Pod is a custom content blazon. In this instance, we create 1 called 'Tour' by clicking on Add New under Pods Admin.
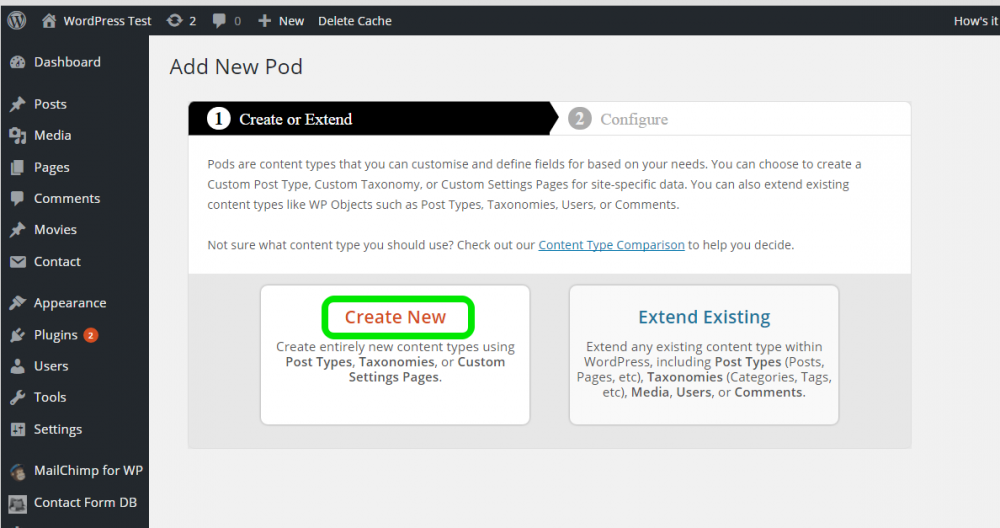
For Content Type, I'grand going to select Custom Postal service Type, and give this new content type a label 'Bout' and the plural characterization 'Tours'. Press Next Pace.

And at present it'southward time to define this content type by adding some fields.
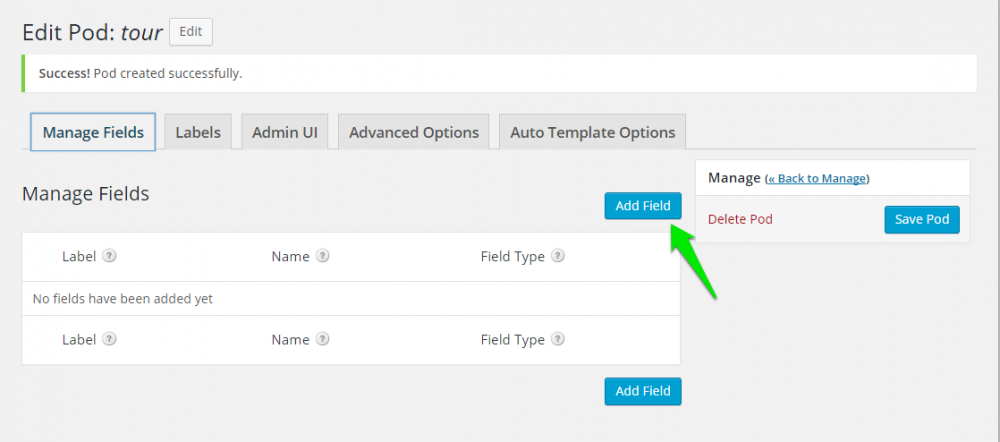
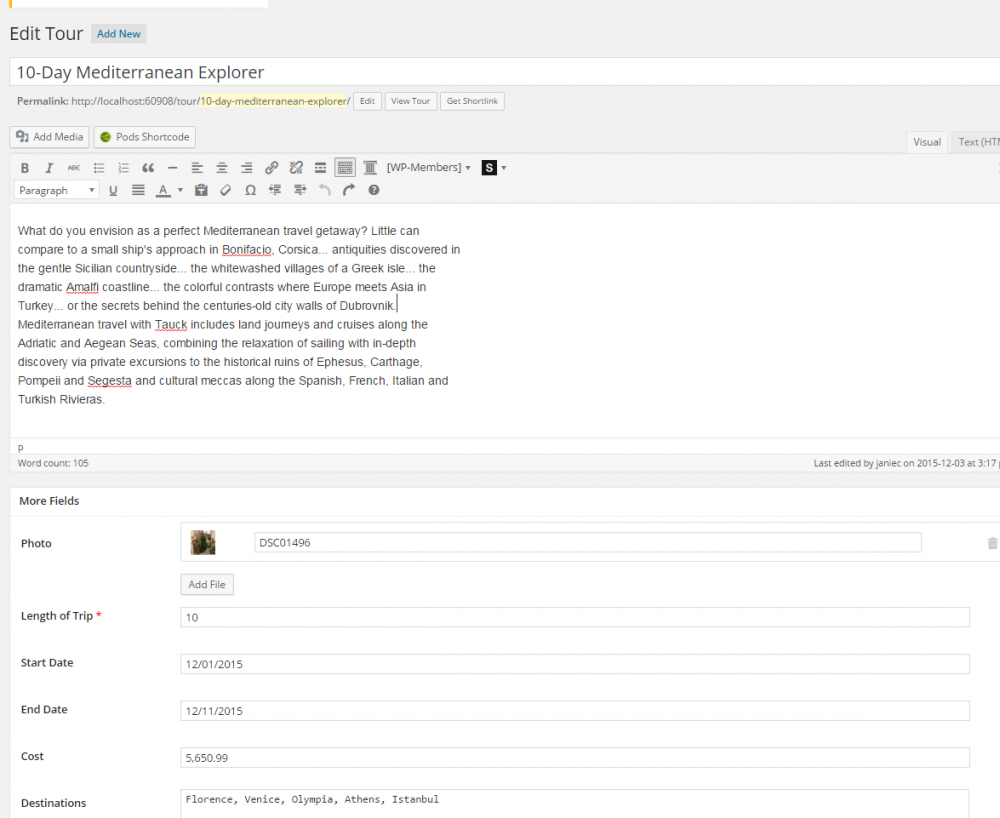
I thing to think is that the title of the page and the body text are assumed to be on the basic post. Yous are simply adding extra fields: Length of trip, Dates of Tour, Destinations, an Image, and Cost.
Just enter Length of Trip as the label, and 'proper name' fills in automatically. The important i is Field Type. I'1000 selecting 'Plainly Number'. Remember to click on Add Field after defining each new field.
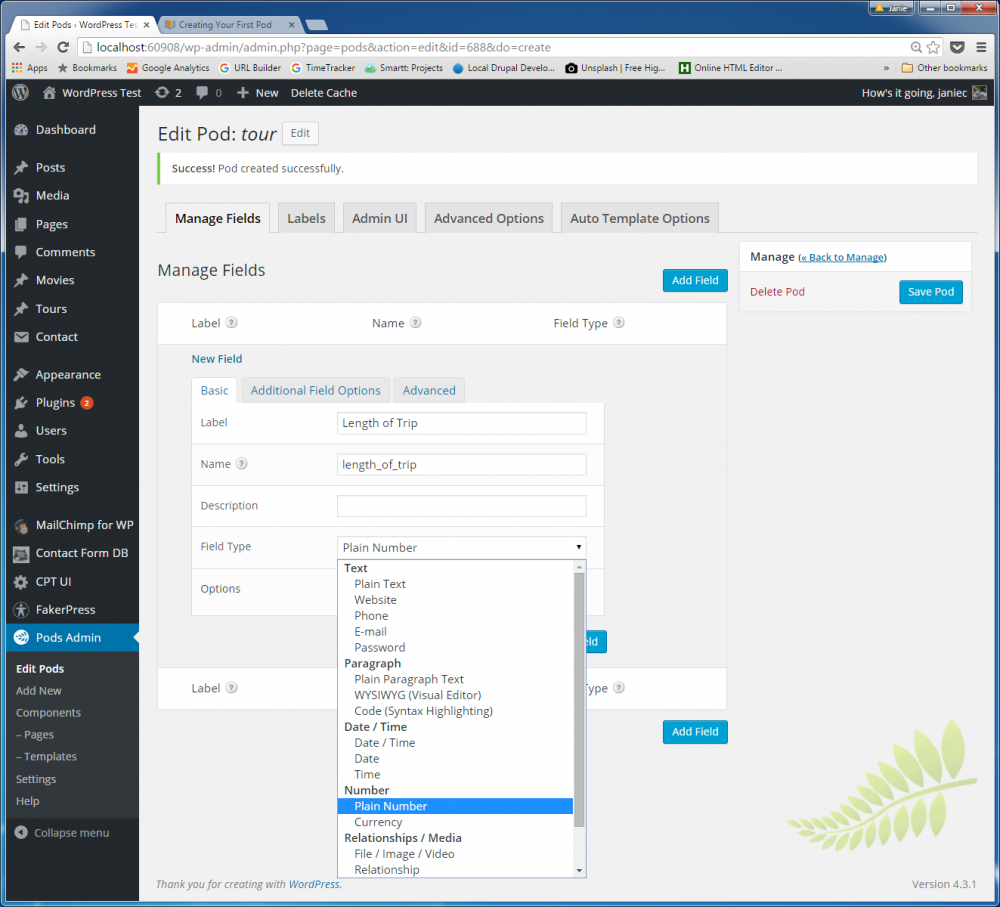
This custom content blazon contains six fields: length of trip, dates of bout expressed as Start Date and End Engagement, Destinations, Cost, and also a Photo. If you want to change the lodge of the fields, elevate and driblet them. This is the order for inbound data, not for how visitors volition run across the page.
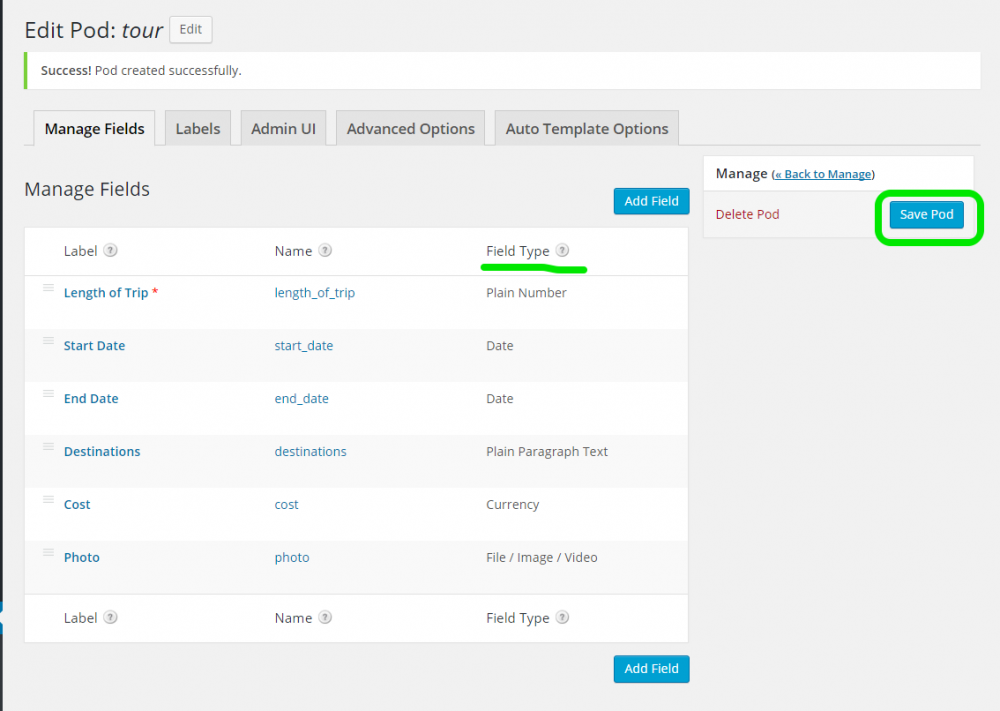
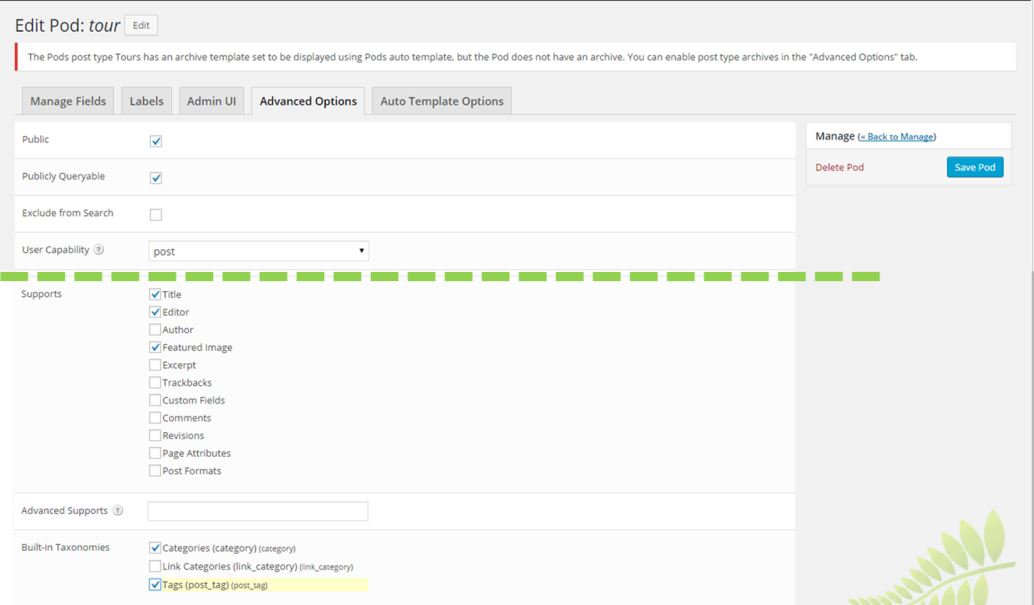
Some other thing you tin can exercise is go into the Advance Options tab to add some useful attributes to the page. For example, if you desire to be able to set tags and categories, allow comments or add a featured image, this is where you select those options. Think to Relieve the pod.
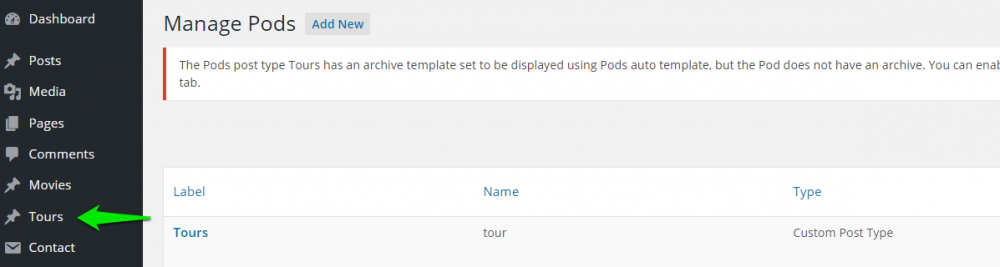
You'll know your new content blazon is active when you look at the Dashboard and see that in that location'southward a new content type called Tours.
Add new content
Now you can click on the new Tours content type in the Dashboard and Add New to create some content. The page's title field is there by default, which is why you didn't need to define one in the pod. The body text field is also there by default. The custom fields yous defined appear beneath.
Set up how the content page looks to a user
Just what will visitors to the page run into? Here is where Templates and some HTML come in. If you don't create a template for your folio to use, content in the fields you only created won't be visible on the folio. From the Dashboard, click on Templates so Add a New Pod Template. Give information technology a meaningful proper noun such every bit 'Tour Template.'
The first thing to do is become to the Pod Reference drib-down list on the right and select the Tours pod, which you've just created. After you do this, you'll encounter a list of all the fields available to y'all. Some of them y'all created, some of them Pods generated automatically. For case, you can run across that 'length_of_trip' is on the list, and so is 'photo'. Only since you set up the 'photograph' field every bit type 'File/image/video', at that place'south also a whole set of boosted fields that have been generated for 'photo' that let you insert a photo as large, medium, or thumbnail size.
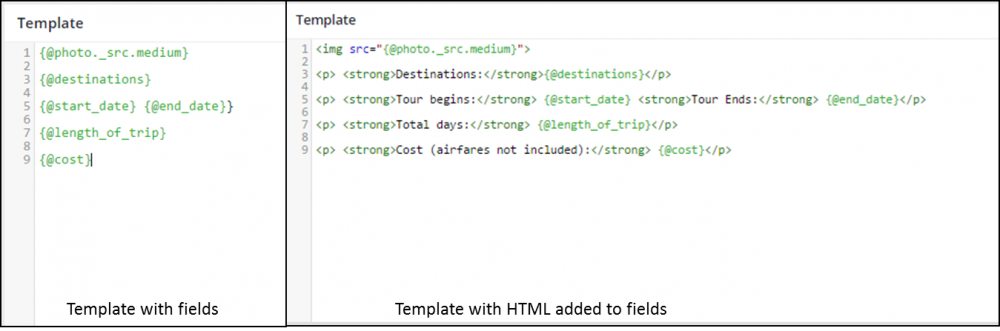
When you enter field names in the Template department, they volition autocomplete for yous (and even close the curly bracket for you) if you select from the drop-down listing. To enter a field name, use the "{@fieldname}" format.
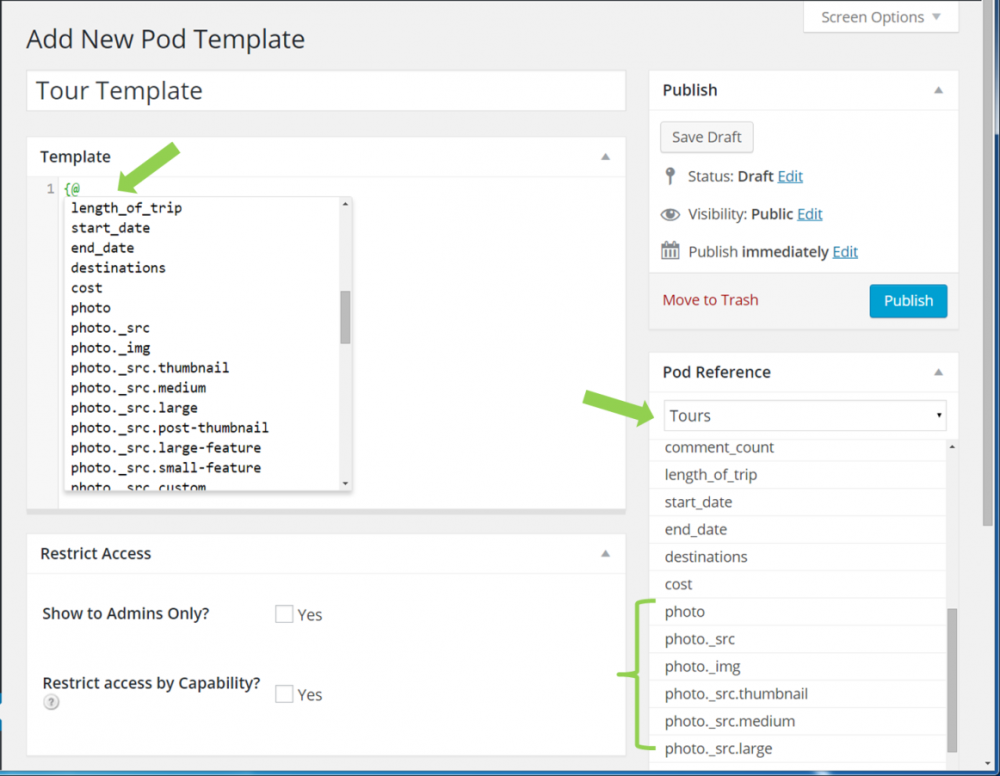
This is likewise where y'all can utilise some HTML to control how the content displays. When you're done, call up to PUBLISH to relieve your work.
Connect a Template to a Content Blazon
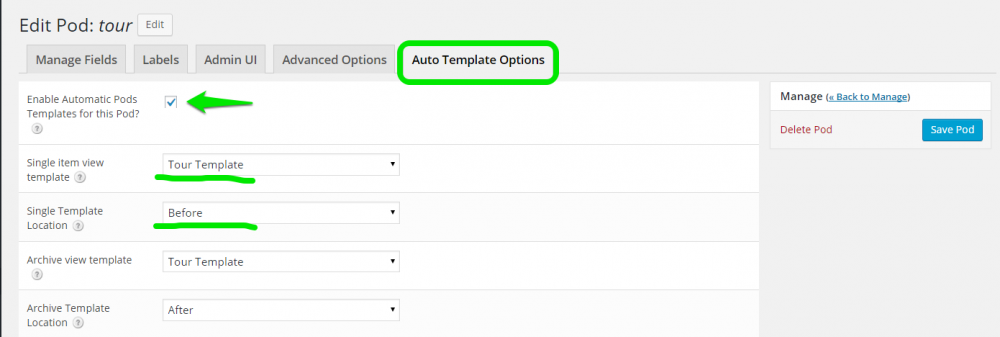
Given that you've made a Pod Reference selection of 'Tours', you'd think the template and content type would already be connected; still, there's still another step required.
Return to Edit Pods in the Dashboard and edit the Tour pod. Select the Auto Template Options tab and select Enable Automatic Pods Templates for this Pod. This opens up the list of templates yous can connect to this content type – the template that controls what Tour pages look like when viewed.
Right now in that location's just ane template, Tour Template, then it'southward the simply one that shows upwardly in the drop-down list. We want the fields from the template to appear Before the main content of the page when in single item view. And for now, nosotros won't worry about the Archive view. Save Pod and let'southward come across how it all looks when you want to enter a tour.
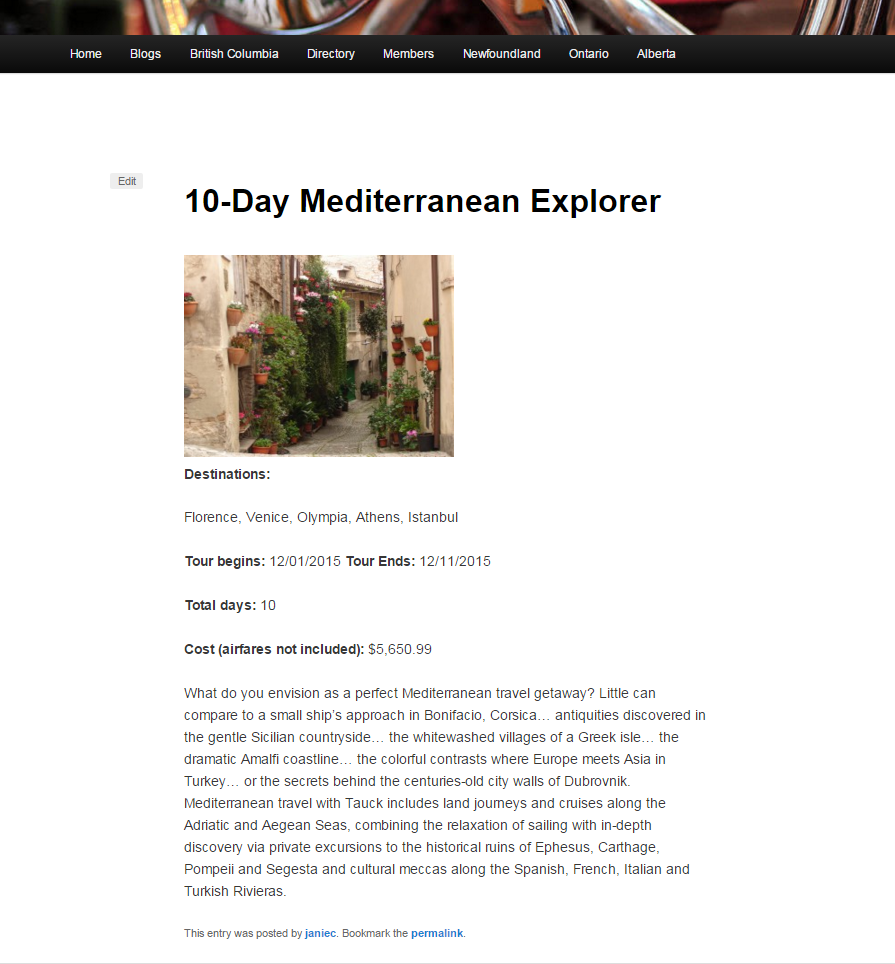
Take a look at your list of Tours and click to view one of them.
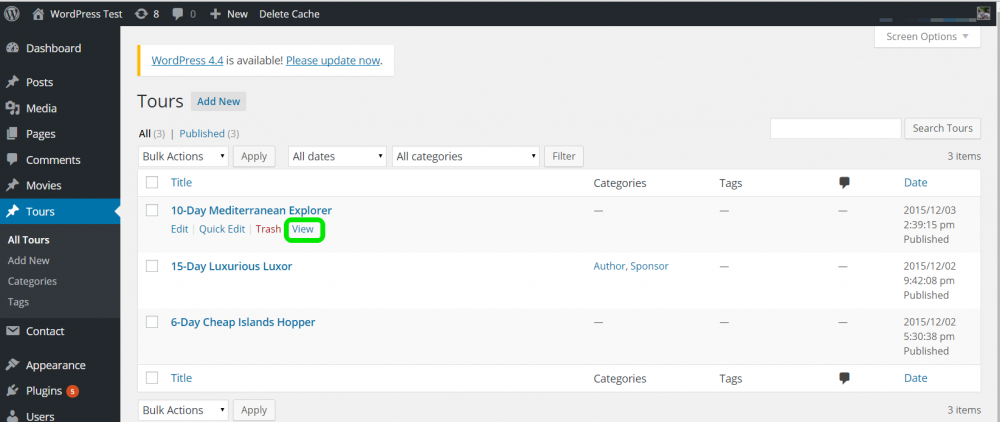
Here'southward how the page displays.
Create a page to listing new content type pages
You'll observe however, that none of those Tour pages accept been added to the main card. Nor is there any way to practice this easily. So in that location's no way for visitors to view them. What we can practice is create a blog-style page to list all the Tours and that'due south the page whose link will be on the main menu.
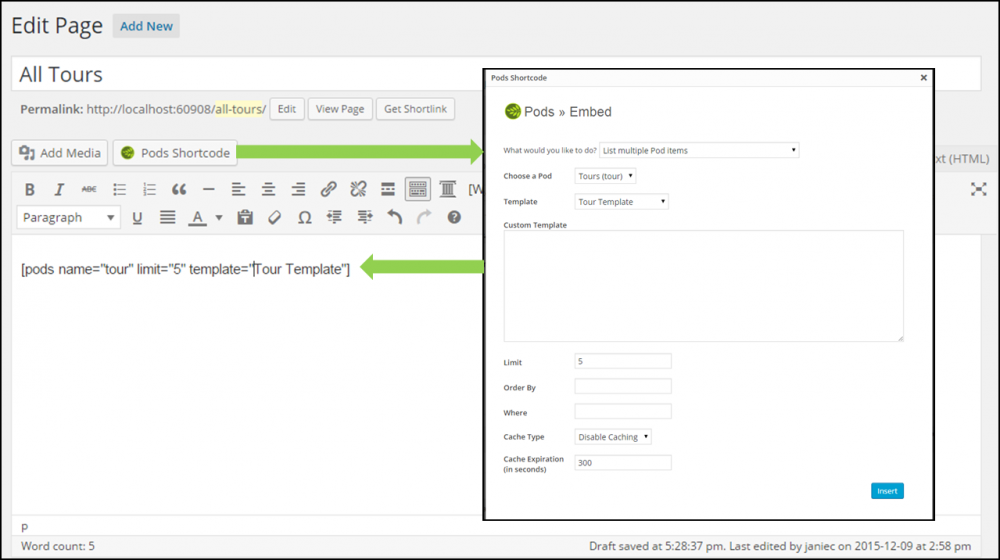
To do this, just create an ordinary WordPress folio; call it 'All Tours'. Brand certain the page attribute is 'No Parent' or that its parent is the card where you want this page to evidence up. So use the Pods Shortcode button, which you'll discover now lives in a higher place your editor.
Click to bring up a dialog where yous can specify what you want: to list multiple Pod items, utilise the Tours pod, apply the Tour Template, and limit the list to v items on a page. Press Insert and Pods generates the shortcode you need.
Return to the Home page where in that location'due south at present a menu link to All Tours.

Click on All Tours, and here is what the folio looks like -- a list of all tours:
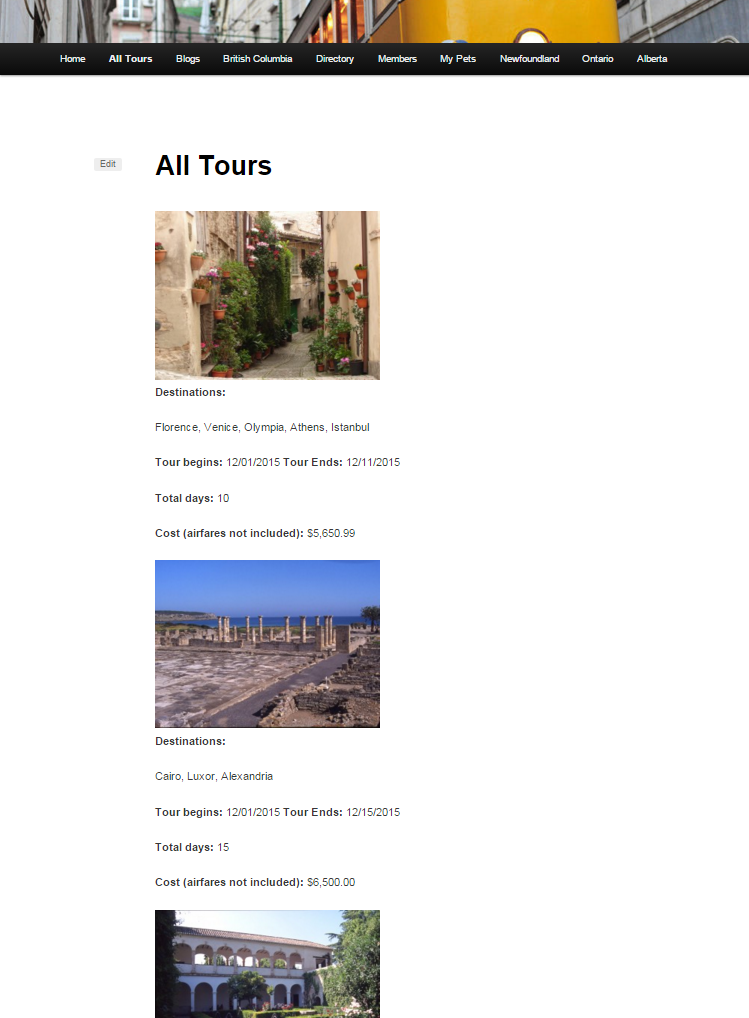
There are issues with this folio however.
- In that location'south no title for each of the tours: this is because the field for the championship was not in the Tours template.
- There's no link to the total single view of each tour: this is because it was non specified in the Tours template.
- Equally you scroll down information technology gets harder to tell which information belongs to each bout considering in that location's no visual separation between Tours
The solution is to create a template which does a ameliorate job of displaying a multiple view of Tours.
Create a template for a multi-view folio
From Pods Admin, go to Templates and add a new template. I'k calling this one 'Multi-Tour Template' and hither is what information technology looks like:
<h2><a href="{@post_title.permalink}"> {@post_title} </a> </h2> <!--The line higher up inserts the title of the post with a link to the post itself --> <p><img src="{@photo._src.medium}" align="right"> </p> <p><stiff>Destinations:</strong>{@destinations}</p> <p> <strong>Bout begins:</strong> {@start_date} <strong>Tour Ends:</potent> {@end_date}</p> <p> <strong>Full days:</strong> {@length_of_trip}</p> <p> <strong>Cost (airfares non included):</strong> {@cost}</p> <60 minutes> <!--This just inserts a line to visually dissever each Bout --> Now just become back to the All Tours folio and edit the shortcode. You can generate it again by using the Pods Shortcode button, or only edit the shortcode from "Bout Template" to "Multi-Bout Template".
[pods name="bout" limit="five" template="Multi-Tour Template"]
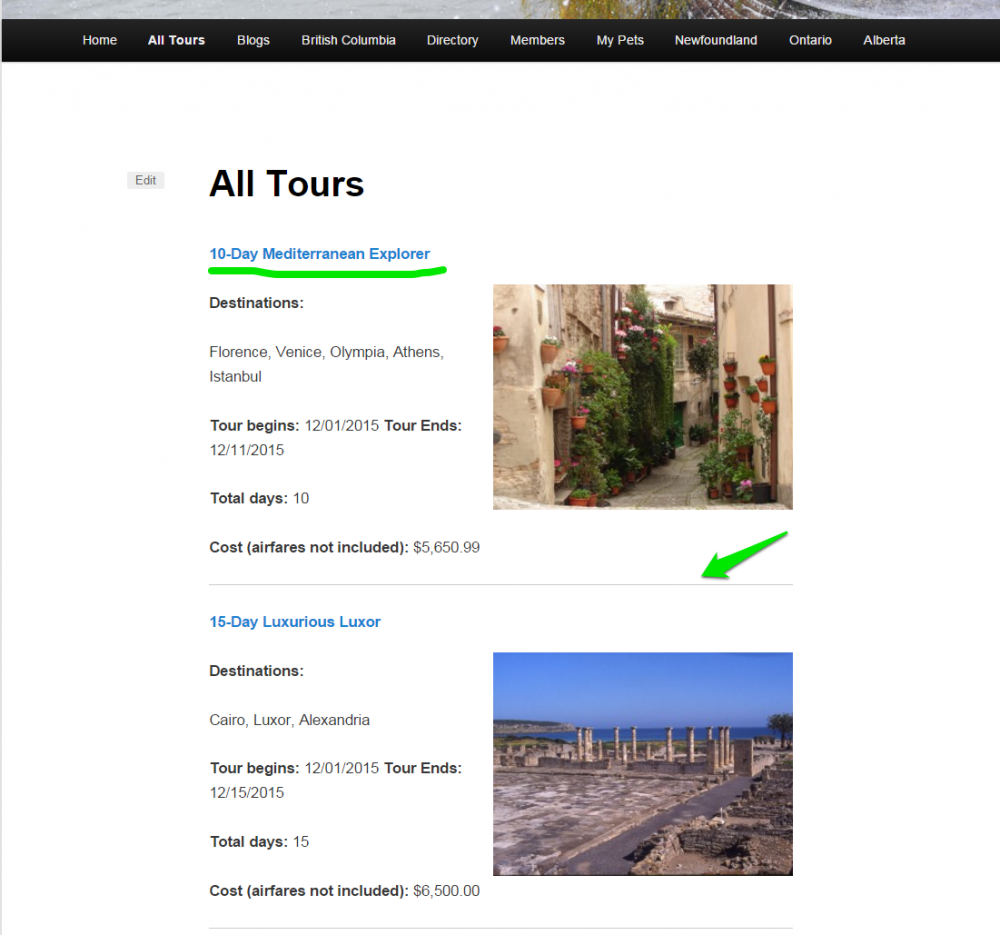
Now when you press View Page, this is how it looks. The title of each bout (post) is displayed, each championship is clickable, and there is a line betwixt tours for a ameliorate visual feel.
Wordpress is a great content direction organization (CMS) for simpler websites that have a lot of static pages plus a weblog. If you lack the programming skills to extend WordPress to meet custom data architecture requirements, the Pods plugin allows y'all create new content types. In many cases you can achieve what yous need without having to go out WordPress or edit code in your theme's functions.php file. Remember that in whatever state of affairs where yous use a plugin, if you lot uninstall the plugin, the things they create and manage may likewise go away.
At Smartt we cull the CMS that best meets your business goals, marketing strategy, and resources. Contact us well-nigh how we work with clients to build websites that support your immediate and long-term needs.

How To Create A Pods Template,
Source: https://www.smartt.com/insights/how-to-create-custom-content-types-for-wordpress-using-pods
Posted by: ruthgairciand.blogspot.com
0 Response to "How To Create A Pods Template"
Post a Comment